Thursday, May 31, 2007

Enjoying Delhi through Food


I visited Delhi recently on a work related trip, and had the most amazing food experiences during my short 4 days there! Delhi is well known for its chaats, parathas and just incredible street food.

I cannot cover all the great food I ate, but will highlight my all time favorite: Dahi Puchkas also known as Dahi Sev Batata Puri in other parts of India!!! What are these you ask? These are basically bite sized and sometimes not so bite sized creations filled with potaoes, mint chutney, corriander, sev, yoghurt, slivers of ginger among other things! It basically is a slice (or bite ;) of heaven in your mouth!

Along with the food in Delhi, I also enjoyed some unique sights of Delhi in surely the most crowded of market in India, Chandni Chowk! Delhi is such a great city, with its unique history, tree lined streets, hip clubs, and unbelievable food, be it on the streets or in its restaurants!
Indomitable Qutab Minar! (Pic taken by my friend S)

Street Food Galore

Buzzing Chandni Chowk

Street barber trimming yes, his clients ear hair :)

This is my entry to Bon Vivant's Meals Abroad event. Hope you enjoy this little preview of a city I would love to revisit soon!
"Poached" Wild Mice


When Bron announced the new Wild Food event, I was truly intrigued! It just sounded so much fun. I looked around in the refrigerator and rummaged for what potentially could resemble a reptile, and found these pears waiting to be ahem, "poached" ;)

I started poaching the pears in wine and then arranged them to look all pretty (erm..), took some pictures, and all of a sudden it hit me that arghhh, mice are NOT reptiles, but mammals! Well, they ARE usually eaten BY reptiles but are not really reptiles themselves!

So now I had these poached pears that tasted really good (what with them being steeped in wine and spices), I decided to go ahead and post the recipe. Do you think I can get away with saying that this was my take on the reptilian theme, where this is wild food fed to the reptiles ;). Oh well, I still love the wild food event idea, so will surely participate next time hopefully with the right entry!

Poached Pear Mice
Ingredients
1. 3 red or pears peeled and halved (don't cut the tail)
2. 1 cup red wine
3. 1/2 cup sugar or 1/4 cup honey
4. A spice pouch consisting of 1 stick cinnamon and 2 cloves. I usually just put these in a muslin cloth, and tie it tight
5. 6 cloves & 1 cup peas for decoration

Method
1. Heat sauce pan on medium heat. Add the wine to the heated pan
2. To this add the spice pouch. Add the sugar/honey and stir
3.When the mixture starts boiling, reduce heat and remove the spice pouch
4. Add the pears and let them cook till they are soft but not mushy to touch
5. Let cool. Use 2 cloves per mouse as eyes
6. Drizzle remaining wine-spice-honey syrup on top of the poached pears
7. Serve on a bed of green peas or something green to bring out the paleness of the mice..err pears

Enjoy :)

Tuesday, May 29, 2007

Instant Pizza Using Leftovers


Had some carrot and peas vegetable curry leftover from making the chilas, so decided to put it to good use the next day! Apart from the cooked mixed vegetable, I had some masala naan and feta cheese in the fridge. Well that was all it took to put together this very quick and tasty naan pizza with leftover veggies!!

This is my entry to the clever Leftover Tuesday event hosted by Pam this month!

Instant Pizza
Ingredients
1. 1 pack Masala or Plain Naan. I get mine from Trader Joe's
2. Any cooked vegetable curry. See the recipe for the vegetable curry that was leftover from the chila cooking sessiom
3. Crumbled feta cheese
4. 1 tsp olive oil
5. Chives for garnish

Method
1. Pre heat oven to 350 degrees
2. Brush the naan with some olive oil
3. Layer the dry vegetable curry on the naan. Top with feta cheese
4. Bake in oven for 5-7 minutes at 350 degrees
5. Garnish with chives and serve hot.

Enjoy :)
Spicy Chicken Potlis


My friend S (who happens to be a really good cook) and I have been cooking up a storm lately. We meet up in the evenings after work, and start brain storming on what to invent next. This not only is a really fun process, but also is a great stress buster after a long day. This was even more fun for the guys who proved to be willing guinea pigs to sample the food on offer ;)

On one such occasion, we put together these extremely tasty puff pastry chicken muffins or potlis as we christened them! Poltis are little pouches which old grannies used to carry in the olden days. Well ours looked a lot like the little pouches and like a granny's pouch was filled with a treasure trove of chicken and spices!
Spicy Chicken Potlis
Ingredients
1. 1 pack puff pastry. I usually use the Pepperidge farm brand
2. 3 cups minced boneless chicken
3. 1 tsp garlic paste
4. 1/2 tsp ginger paste
5. 1 tsp red chili powder
6. 1/2 tsp Malwani masala. You can replace malwani masala with 1/4 tsp of garam masala
7. 2 tsp olive oil
8. Salt to taste

Method
For the Filling
1. In a pan, heat the oil.
2. To the heated oil, add the ginger garlic. Saute for 1-2 minutes till the ginger garlic turns golden brown
3. Add the chili powder and malwani/garam masala. Saute for a minute
4. Add the minced chicken and mix well. Add salt and let the chicken cook
5. Once chicken is cooked, cool and keep aside
For the Potli
1. Thaw the puff pastry dough in accordance with the package instructions
2. Pre heat oven to 350 degrees
3. Roll out the pastry dough and cut into pieces that will fit in a muffin pan
4. Line the muffin pan with the rolled out puff pastry and layer it with the filling mixture
5. Leave some space at the top of the rolled puff pastry. Close the puff pastry at the top to form a little pouch. Take a small piece of the pastry dough and make a ring around the stuffed puff pastry
6. Bake in the oven at 350 degrees for 20-25 minutes or until the puff pastry is a flaky golden brown
7. Serve with ketchup or mint chutney.

Tip: You don't need to spray the potlis with oil before putting in the oven as the puff pastry dough has enough of butter in it.
This is my entry to Arfi's thought provoking Cook and Eat Meat event.
Enjoy :)

Saturday, May 26, 2007

Ratalyacha Khees/Savory Sweet Potato with Peanuts


Sweet potato features in the top 10 of my favorite comfort foods! This is really great, given the many nutritional virtues of this versatile vegetable. I say versatile as it can be enjoyed in many different ways, in a dessert, as a savory snack, a binding agent, or by simply boiling the vegetable and mixing it with milk and sugar (yumm!).

Ratalyacha Khees or Savory Sweet Potato with peanuts is one of the more popular fasting dishes in Maharashtra. It always brings back memories of my mom fasting and we EATING! Of course, it didn't really matter that the kids almost never fasted, but it sure made for a great excuse for us to gorge on those tasty, not reminding one of starvation treats ;)

This is an extremely simple and quick recipe to make, and is my submission to Nupur's A-Z of Indian vegetables 'R' letter event.

And yes, the mango in the picture is indeed The Alphanso mango!! We finally got our hands on this precious fruit last evening at $4 a pop, but oh SO totally worth it!!!!

Ratalyacha Khees
Ingredients
1. 2 sweet potatoes grated (I leave the skin on to increase the nutritional value)
2. 2-3 green chillies chopped
3. 1 cup ground peanuts (shengdanyacha koot)
4. 2 tsp olive oil or ghee
5. 3-4 sprigs of coriander finely chopped
6. 1 tsp lemon juice
7. 1 pinch sugar
8. Salt to taste

Method
1. In a pan, heat the oil/ghee. Traditionally we use ghee as oil is not allowed as a fasting food. But given that I cook this on any and every non fasting occasion, I use olive oil :)
2. To the heated oil, add green chillies and sauté till they change color
3. Add the grated sweet potato and saute for 1-2 minutes
4. To this add the ground peanuts, lemon juice and sugar
5. Add salt and coriander.
6. Mix well. Cover with a lid and let it cook for about 5-8 minutes or till the sweet potato is cooked. You may need to add some water if needed.
7. Garnish with chopped coriander and serve hot.

Enjoy :)

Friday, May 18, 2007

Quick Stuffed Chila & Microwave Peas Dhokla


I was inspired by Nupur's suggestion that in place of a vegetable starting with 'Q' (is there even such a veggie in existence?), we could submit Quick recipes for her A-Z of Indian Vegetables event! That, along with the need to cook something quick & nutritious on a week night got me looking into Tarla Dalal's rich repertoire of recipes. As expected, that was just the place to find something healthy and easy to make with ingredients I had in my pantry.

This submission to Nupur's event is my adaptation of two such recipes. The Chila came out perfect, but can't say the same about the Peas Dokla (as it evident from the pics :(). The taste of the dhoklas was awesome especially with the peas puree mixed in, but just didn't look as pretty as I would have liked. I think I need to try this recipe again to see if it comes out better!

Quick Stuffed Chilas
Ingredients
For the Chila
1. 1 cup besan (chickpea) flour
2. 3 tsp olive oil
3. Salt for cooking
For the Filling
1. 1 cup peas
2. 1/2 cup chopped carrots
3. 1/2 tsp ginger
4. 1-2 green chilies, finely chopped
5. 1/2 tsp mustard seeds
6. 1/2 tsp cumin seeds
7. 2 tsp olive oil
7. Salt to taste
Method
For the Chila
1. Mix the chickpea flour, 1 tsp oil and salt. Add water to form a thin, pourable batter
2. Pour a pancake sized spoonful of the mixture onto a heated non stick pan. Spread evenly
3. Let cook well on both sides till golden brown
4. Remove from heat and keep aside
For the Filling
For the stuffing mixture
1. Heat oil in a pan and add cumin and mustard seeds. Roast till they splutter
2. Add green chillies and ginger paste. Sautee for a minute
3. Add the carrots and peas and sautee till partially cooked
4. Add salt to taste
Put a spoonful of the filling on one side of the chila and fold the other side to cover it. Serve with mint chutney or tomato ketchup.

Microwave Peas Dhokla
Ingredients
1. 1 cup besan/chick pea flour
2. 1/2 cup boiled green peas
3. 1/2 tsp ginger
4. 1/4 tsp green chili paste
5. 1/2 tsp powdered sugar
6. 1 cup water
7. 3 tsp oil
8. 1 tsp citric acid crystals
9. Salt to taste
10. 1 tsp mustard seeds
11. 2 chopped green chillies
12. 2 tsp corriander
13. Grated coconut
Method
1. Purée green peas to a smooth paste
2. Add 1 tsp oil chickpea flour, ginger, chilli paste, salt, sugar, citric crystals and water
3. Beat well together till it becomes a smooth consistency
4. Pour in a greased microwave dish and microwave with a lid on high for 3 minutes
5. Remove and let stand for 2 minutes
6. Combine 1 tsp oil and mustard seeds, 1 tsp corriander in a microwave safe bowl and microwave for 2 minutes
7. Pour over the baked dhokla
8. Garnish with remaining corriander and grated cocunut
Serve with mint chutney.

Enjoy :)

Wednesday, May 16, 2007

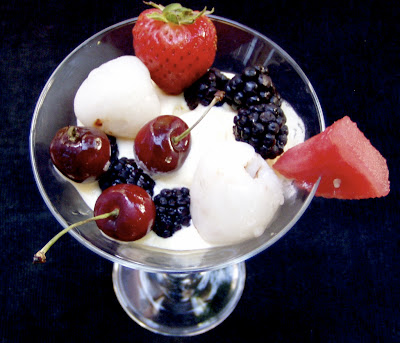
Quencher Kumquat Ice Cream


When Nupur announced the letter ‘Q’ for her amazing A-Z of Indian Vegetables event, I couldn’t really find a vegetable befetting that letter ! The closest I could come to the sound was Kumquats (well it DOES have a ‘Q’ in there somewhere!). I will submit and post "quick" recipe in the next post instead.

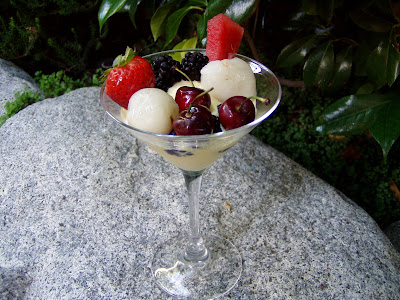
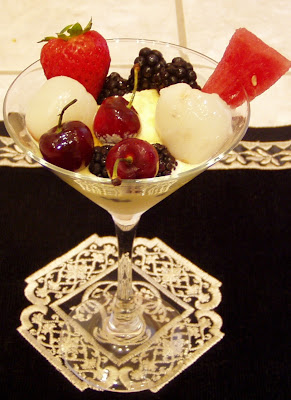
Meanwhile the weather here in North California is getting hotter by the day, so decided to whip up some thirst quenching ice cream topped with the incredible bounty of fresh fruits available in the local farmers markets.
Kumquats are small, oval citrus fruits that are bursting with flavor. It has a sweet outer skin, where the flesh is tart. I usually eat the fruit whole, popping in 2-3 at a time ;)

The sourness of the kumquats balance very well with the ginger and lemon zest added to the ice cream. The topped fresh fruits add that extra “icing” on the already tasty ice cream. This recipe is adapted from the Kumquat growers site
Kumquat Ice Cream
Ingredients
1. 3/4 pound kumquat, with the seeds removed & sliced thinly
2. 1 cup water
3. 3/4 cup sugar
4. 1 1/4 cups heavy cream
5. 1/4 cup lemon zest
6. 1/4 inch fresh ginger, finely chopped (optional)
7. 1 cup fresh fruits for the topping (optional)

Method
1. Add the kumquat, water and sugar in a saucepan; simmer until cooked. This may take about 30 minutes
2. Purée the mixture and let cool. Fold cream into the purée and mix in the lemon zest and ginger
3. Pour the mix into a container, cover and freeze until firm, beating twice at hourly intervals
4. Freeze the ice cream in the refrigerator
Alternatively, you can use an ice cream maker to prepare the ice cream.
5. Top with fresh fruits

Enjoy :)

Tuesday, May 15, 2007

Easy Breezy Palak (Spinach) Chicken


Spinach chicken is one of R and my favorite chicken dishes. The 1st time I had it was at the ever popular Shalimar restaurant. Although I loved the taste, I didn't quite like the excessive oil in the Shalimar version. So I decided to de-construct the recipe and try making it at home.

That was over 2 years ago, and now this is a staple chicken recipe in our household. This is also a great way for us to get in our regular dose of spinach ;)

Paalak (Spinach) Chicken
Ingredients
1. 2 tbsp oil
2. 1 pound chicken chopped into bite sized pieces (boneless or with bones)
3. 2 cups finely chopped fresh spinach
4. 1 cup finely chopped onions
5. 1/2 tsp ginger paste
6. 3/4 tsp garlic paste
7. 1/4 tsp cumin powder
8. 1/2 tsp coriander powder
9. 3-4 green chillies split into 2
10. 1/2 tsp turmeric powder
11. 1/4 tsp garam masala
12. 1 tsp lemon juice
13. Salt to taste
14. 1/4 cup water

Method
1. Heat oil in a wok. Add chopped onions and sauté till translucent
2. Add turmeric powder and sauté for 30 seconds
3. Add green chillies, ginger-garlic paste and sauté for 1 minute
4. Add cumin and coriander powder and sauté for 1 minute
5. Add the chicken and let the chicken brown
6. Add the spinach and sauté
7. Add the garam masala and mix well.
8. Add salt and lemon juice
9. Sauté for another minute. Add the water and let cook with a lid

Serve with Garlic Naan or Saffon Rice.

Enjoy :)

Sunday, May 13, 2007

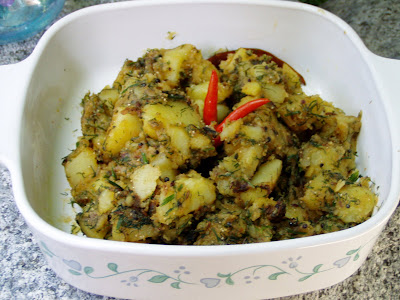
Khus wale Aloo (Potatoes with Poppy & Dill)


Potatoes are an all time comfort food. Which is why I am always looking for new and innovative ways to cook this versatile vegetable. I was inspired by one of my favorite blogger Ashwini's til aloo recipe. Only thing is I didn't have any sesame seeds on me, but had 2 packs (don't even ask!) of poppy seeds and lots of fresh dill! While that explains how this dish got altered, I must say this a super simple recipe with guaranteed satisfaction. I have made this for 2 dinner parties so far, and has been an absolute hit. One of our guests recently mused how such a simple dish can balance subtle flavors so perfectly making every bite an amazing explosion flavor!

The crunchiness of the poppy seeds blends perfectly with the softness of the boiled potatoes and freshness of the dill leaves.

Potatoes with Poppy & Dill Recipe
Ingredients
1. 3-4 medium size potatoes
2. 1/2 tbsp white poppy seeds
3. 1/2 cup finely chopped dill
4. 1/4 tsp ginger paste
5. 1 tsp cumin seeds
6. 1 tsp mustard seeds
7. 1/2 tsp garlic paste
8. 1/4 tsp turmeric powder
9. 2-3 red chillies
10. 1 tsp lemon juice
11. 2 tbsp oil
12. Salt to taste

Method
1. Boil potatoes in salted water and cut into medium sized cubes
2. Heat oil in a pan and add mustard seeds. When they begin to splutter add cumin seeds and red chillies and roast for a minute
3. Add ginger-garlic paste and roast. Add turmeric powder
4. Add poppy seeds and roast for 30 seconds
5. Add boiled potatoes and dill
6. Add lemon juice and salt to taste
7. Let it all mix well together and cook for another 2 minutes

Serve with Naan or Chapati.

Enjoy :)

Saturday, May 12, 2007

Prosciutto Cheese Rolls & Caramel Dipped Strawberries


Prosciutto & cheese is a classic combination that is hard to resist! The most commonly paired cheese with prosciutto is goat cheese, but I soon found out after making this dish that mozzarella & prosciutto is an AMAZING combination as well. The freshness of the Mozzarella paired with the cured meat is goes down real easy ;)

This simple dish with some kale chips which I will write about a later date and finished off with caramel dipped fresh strawberries made for the perfect Friday night meal!

Cheese Prosciutto Rolls
Ingredients
1. 1 block Mozzarella or Provolone cheese
2. 4 prosciutto slices. I like the one from Whole Foods or TJs
3. 4 basil leaves

Method
1. Cut long strips of the cheese and spread out
2. Lay a strip of prosciutto on top of the strip of cheese
3. Top with basil leaf
4. Shape into a bite sized rolls and serve chilled.

Enjoy :)

Friday, May 11, 2007

Eating Out...at the Thai Temple?


I am not sure this entry qualifies for Stuff You Oughta Know's Carnival of Dining out , but I plan to send it anyways. The event is a really cool one, where bloggers are encouraged to comment about their favorite restaurant scene: local or otherwise.

There are so many such restaurants that I would love to write about given that am lucky enough to live this close to the mecca of good food: San Francisco! But today, I write about the most authentic Thai food I have had outside of Thailand.

Where is this you ask? Believe it or not, but I found amazingly good Thai food at the local Thai temple! Most dishes cost $5, with the desserts costing even less. R and I went there one Sunday afternoon where we had the most incredible Pad Thai, Som Tam, and never ending desserts. Ok, in our defense, I ordered the Som Tam extra spicy and then had to wash it down with desserts and more desserts (yah right ;).

The Som Tam (Raw Papaya Salad) was made fresh where the spices were ground and altered to my taste. Same with the Pad Thai, which seemed to be the most popular dish around, as we were the lucky to get our hands on the last plate being made. As you can imagine, we had to quickly wipe off our satisfied grins to avoid angry stares from people waiting eagerly in the line behind us!!

Desserts vary from sticky rice with mango, to lots of bean and coconut based traditional desserts. All the food is prepared by Thais living in the area so you know you are getting the real deal. Moreover, you eat the food on the beautiful calming lawns of the temple. In warm weather, this is an immensely pleasurable dining experience. This open air food haven is only open weekends (Sundays only I think). Make sure you go early to avoid missing the fast disappearing Pad Thai!

My Ratings:
Food: Mmm... (Good). Not an extensive "menu" so don't look for Kung Pao Chicken here ;)
Decor: The temple grounds overlooking the mountain can't be beat!
Service: Self service
Price: Yay. The $5 entree is worth the visit alone.
Would Go Again: Yay yay!
Website: http://www.watbuddha.iirt.net

Thursday, May 10, 2007

Orange Chicken


I have been craving orange chicken for a while now. That combined with the minimal time available to cook dinner tonight was enough incentive to put together this quick simple meal of orange chicken and rice.

Orange Chicken
Ingredients
1. 4 chicken legs
2. 2 tablespoons olive oil
3. 1/4 cup onion, chopped
4. 1 1/2 cup orange juice
5. 2 tablespoons Dijon mustard
6. 1/2 teaspoon soy sauce
7. 1 teaspoon pepper
8. 1 teaspoon red chili flakes
9. Salt to taste

Method
1. In a large skillet, heat the oil and saute chicken legs over medium heat until browned and cooked through
2. Remove and cover. Keep warm
3. In the same skillet, add saute onion until translucent
4. Add the orange juice, dijon mustard, soy sauce, pepper, chilli flakes and salt. Keep in mind that the soy sauce is salty, so add less salt than usual.
5. Cook stirring constantly until it thickens slightly
6. Spread over chicken and serve with rice

Enjoy :)

Wednesday, May 09, 2007

Restaurant Review: Zeni

Pic courtesy Zeni's website

Now this is one restaurant that can be epitomized as “Zany” !! Went there for a quiet celebration, where the setting was perfect for an enjoyable, sit down dinner with friends. The decor in the back area is fun with large, colorful tables in tune with the communal style eating, which is an integral part of the Ethiopian dining experience. The walls and ceilings were interspersed with artwork and animal skin paintings created by Ethiopian artists. Minimal lighting and lilting music set a relaxing mood.

The Zeni menu is fairly extensive compared to other Ethiopian restaurants. As we were a group of 8, we went in for the entree combo, which included any 4 entrees including a meat or veggie combo. If you haven’t been to an Ethiopian resto, your best bet for 2-3 people would be to get a veggie ($9), or a meat combo ($11) . Dessert consisted of Baklava, which while not g8 is an improvement, considering most Ethiopian restos do not offer any desserts.

The food was very good, and paired well with Tej honey wine. Wine snobs who believe that anything sweet does not qualify as wine, can have the Ethiopian red wine, which also goes well with the food. However, do look at the alcohol content as it is significantly higher than American wines ;-)

My only peeve about Zeni was the servers. This is a sentiment shared by other reviewers of Zeni as well. The servers while not openly unpleasant, don't seem terribly excited about being there!! The only time we got to see even a flicker of animation on our server’s face, was when a guy sitting next to us crashed on the floor, taking a few glasses with him! Even then, the best we got from our server was a startled look, a la Miss Universe on winning the not expected to win crown!!

Other than the servers, and the fact that they did not have the much famed Ethiopian coffee that day, dining at Zeni is a fun experience, provided you get one of the seating areas in the back room. The front portion is fairly kitschy, with a tiki hut for a bar and the standard table and chair seating. The location surely could have been better, as I personally am not a big fan of restaurants located in strip malls, but once you look past that and the impassive faces of the servers (not tough to do ;-), Zeni is a good find !!

My Ratings:
Food: Mmm... (Good). Healthy portions. Lots of options for vegetarians!
Decor: Yay
Service: Nay
Price: Yay. The $45, 5 entree combo cannot be beat especially if you go with a large group. $6-8 for wine and cocktails.
Would Go Again: Yay!
Website: http://www.zenirestaurant.com/

Tuesday, May 08, 2007

Refreshing Mango Lassi


Seems like summer is here to stay! Temperatures soared to 90 degrees over the weekend and have been continuing to soar ever since.

R loves a good mango lassi, and so decided to whip up some for breakfast. This made for one refreshing and filling breakfast on a super hot day. It not only kept us cool for rest of the morning, but the resulting sugar high was a welcome side effect ;)

Mango lassi is supposedly a super popular drink in Bombay, but oddly enough the 1st time I had it was in the US! For the true blue Bombayites this was sacrilege, right up there with the fact that I had not watched Sholay till a few years ago! Go figure. Given that I grew up on savoring the prized Alphanso mango in its purest form eaten by itself, mixing it with yoghurt seemed like an unattractive proposition initially. But after a few attempts at trying to find the perfect, non saccharine filled mango lassi, I understood why it is so revered among the legions of left college in the 90s generation !!

Speaking of Alphanso mangoes, R is awaiting its arrival in North California with more excitement than his graduation results! And yes, the thought of traveling to New York to buy even ONE mango from the 1st ever Indian mango export consignment sent to the US (after the 18 yr ban) did cross his mind…not once but several times!!

This is my entry to the timely Summer Fruits Breakfast Blogging event hosted by Padmaja of Spicy Andhra. I hope to be able to post a fresh Alphanso mango based recipe soon ☺

Mango Lassi
Ingredients
1. 3 cups mango pulp. Mango pulp is available in any Indian grocery store. I use the Laxmi brand kesar mango pulp
2. 1 cup plain yoghurt
3. 1 cup cold milk
4. 1/2 cup sugar (alter according to taste)
5. Salt to taste
6. 1 tsp black pepper (optional)


Method
1. Add all the ingredients in a blender and blend for 2-3 minutes till its a smooth consistency. Make sure there are no white swirls from the youghurt or milk
2. Pour into individual glasses and serve
3. Garnish with fresh mango, water melon or any other fruit

Enjoy :)

Monday, May 07, 2007

Peas & Corn Pattice


Aah, the quintessential question I get asked by my non-Indian friends: what is a pattice. What is it indeed? A pattice is really the equivalent of a patty but with a twist. The Indian pattice is more often than not filled with a spicy vegetable or meat filling, and always brings back waves of nostalgia of the corner bakery where I grew up.

My version of the pattice came about accidentally one day, where I had loads of peas, corn and ready to bake Pillsbury biscuit dough at hand, and some really hungry guests to feed pretty quickly.

This is my contribution to Nupur's incredible A-Z Indian Vegetable line-up

Peas & Corn Pattice
Ingredients
1. 1 pack Pillsbury ready to bake biscuits
2. 2 tsp olive oil
3. 1 cup fresh or frozen peas
4. 1 cup fresh or frozen corn
5. 1 cup chopped spinach
6. 1 onion finely sliced
7. 1/2 tsp ginger garlic paste
8. 1 tsp red chili powder
9. 1 pinch garam masala
10. 1/4 tsp lemon juice
11. Salt to taste
12. 1 cup cheese (optional)

Method
1. Pre-heat the oven to 350 degrees
2. Make sure the biscuit dough is at room temperature
3. In a pan, heat some oil
4. Add the onions and sauté till translucent
5. Add the ginger garlic paste and fry till brown
6. Add the spinach, peas and corn and sauté for 2 minutes
7. Add red chili powder and the garam masala and sauté for another 2 minutes
8. Add salt and lemon juice to taste
9. Remove from pan and let the mixture cool
10. Spread out the biscuit dough to form the bottom. Layer with the vegetable mix.
Top with cheese. Roll the biscuit so that the 2 ends touch each other (almost like a croissant).

Serve with ketchup or mint chutney. Enjoy :)
Thursday, May 03, 2007

Masala Crab for Mom


Cooking crab has long been a fantasy of mine, but I was always daunted by the sheer challenge of cleaning and prepping err, the crab!
One day while at the farmers market R and I gave in to temptation and got home 2 large Dungeness crabs. Well THAT was the easy part. We got home and stared at the crustaceans for the longest time wondering where to begin.

This could have easily turned into a crabby affair, when R decided to use what else but Google, to figure out what to do next. Lo and behold, we found step-by-step cleaning and dividing instructions , with pictures nonetheless! Once the cleaning was done, preparing the crab was a piece of cake given this simple recipe that has been passed down from my grand mom to my mom and now from my mom to me….

Today I am making the very same masala crab for my mom who inspired me to want to cook it in the 1st place. This is also my entry to Food Fight #2, where am really glad Allen of Eating out Loud decided to host this event in honor of Mother’s Day!

My mom is an excellent cook to say the least. She hails from the spice-loving region of Kolhapur in India, and cooks up a feast of dishes from that region. In fact she recently visited us from India, where we were in true gourmet heaven! Every day was a foodie dream come true with multi course meals for lunch and dinner, not to mention lavish breakfasts and tea time snacks! I wish I had spent more time learning some of the traditional recipes, but hopefully will be able to do that on her next visit here!!

Kolhapuri Masala Crab
Ingredients
1. 2 large crabs
2. 1 cup diced onion
3. ½ cup desiccated coconut
4. 2 tsp Kolhapuri masala. Alternatively, you can substitute the Kolhapuri masala with 1½ tsp red chilli powder, 1 tsp dhana-jeera powder, 1/4 tsp garam masala
5. 1 tsp turmeric powder
6. 1 tsp lemon juice
7. Salt to taste
8. 3 tbsp olive oil

Method
1. Clean and divide the crab. Preserve the crab shell for presentation
2. In a large pan, heat oil and sautee the onions till they are translucent
3. To this add the turmeric and roast for 30 seconds
4. Add the Kolhapuri masala and saute for a minute
5. Add the crab legs and meat and mix well with the spices
6. Add dessicated coconut and satue for a few minutes
7. Add salt and lemon juice to taste
8. Cover the pan and let crab cook for a few more minutes. Keep in mind that the crab cooks pretty quickly.

Serve as an appetizer, or with with saffron rice/naan. Enjoy :)