Wednesday, April 29, 2009

Mango-Chocolate Mousse with Vodka


I promised to post this recipe soon, but that soon didn't come soon enough. Thanks S for motivating me to post this. Do let me know how it turns out!

This is not your typical mousse recipe, but I liked that it was light and of course full of that great mango flavor. I also spiked it with Vodka and chocolate. For those who remember I made it for Holi along with the now infamous Gol Guppa shots (hic hic!).

Mango-Chocolate Mousse with Vodka Recipe

Ingredients

1. 2 cups Mango Puree (I used the Desai Bandhu Alphonso mango pulp.)
2. 1/3 cup powdered sugar
3. 1 cup Plain yogurt (I used full fat)
4. 1 cup heavy cream
5. 1 oz packet unflavored gelatin
6. 1/4 cup vodka (optional)
7. 1 cup chopped good quality dark chocolate
8. Handful of coco nibs or chocolate shavings for garnish

Method

1. In a small saucepan sprinkle the gelatin over 1/4 cup cold water. Let it soften for a minute, and heat the mixture over low heat, stirring, until the gelatin is dissolved.

2. In a blender blend together the mango puree and sugar. Add the gelatin mixture, and blend well.

3. Transfer the mixture to a bowl and stir in the yogurt and vodka.

4. Add some vodka to the chopped dark chocolate and melt the chocolate (making sure it does not burn). You could even just melt the chocolate-vodka mix in the microwave for 2-3 minutes. Using a spoon, pour the melted chocolate at the bottom of your dessert/serving glass. Swirl some of the chocolate mix on the sides of the glass as well.

5. In a chilled bowl beat the cream until it holds stiff peaks, fold it into the mango mixture gently but thoroughly, and pour the mousse in the chocolate swirled dessert glasses.

6. Chill the mousse for at least 4 hours or overnight.

7. Garnish the mousse with the coco nibs or with mint and mango slices.

The Vodka and chocolate can easily be omitted to make a pure mango mousse. combine. However, I liked the bitterness of the chocolate and vodka that tied in well with the sweetness of the mango pulp. Not to mention the chocolate swirl on the glass made it look even more appealing!


I am sending this chocolate laden treat to Tasty Treats' For the Love of Chocolate event! Given my chocoholic nature, I can't wait to see the entries for this one!

Enjoy :)

Monday, April 27, 2009

Spring Watermelon-Papaya Salad

I want some now!


Living in California, we are extremely spoiled by great weather. Last week we all complained when the temperature reached 94 degrees saying this was way too hot. 2 days later, we all started complaining about how cold it was when the temperature dropped to a shocking 75 degrees :D.. Oh well, I guess after paying those extremely high home prices/rents/taxes, that's the least we can do eh :P

I for one am thoroughly enjoying the warm spring weather this year! It surely was time to cool it off with a refreshing watermelon-papaya salad which I have blogged about earlier. You can get the detailed recipe here.

Given that nothing speaks Spring like a Crisp Watermelon Salad, I am sending this to Bee & Jai's Click:Spring/Autumn event.

Tuesday, March 31, 2009

Pani Puri shots, Mango Chocolate Mousse & Wood

Pani Puri Shots, Mango Mousse and Wood !


Ok, now that's an odd combination if I saw one!! What are these three things doing together I wonder. Well, I made Pani Puri shots & the Mango Mousse for Holi recently, and wood...well that's the theme of this month's click photography event hosted by Jai & Bee. Ok wait, before I go far ahead with this, what are pani puri shots anyhow? I have been asked that question several times these last few weeks (maybe it was those drunken pics post the shots my friends saw;). Pani puri shots are your regular gol guppas but with a punch....the punch being vodka, gin, tequila...you get the drift ;).

The other thing I made for Holi this year was a quick Mango Mousse also spiked with Vodka...well it was Holi with the song Rang Barse blaring away in the background..what can I say :D the Mango Mousse with a chocolate bottom turned out pretty good...or maybe after all that Vodka, everything just seemed to taste g8 :D...either ways let me know if you make any of these and hopefully are less drunk than I was to tell what you really think of them :D

I was planning on submitting this photo to Jai & Bee's fantastic photography event, but alas just realized that I was too late :(...
When I took this pic, I thought oh this came out nicely..but then went on to their site to look at the current entries and was blown away....its hard to believe so many of the entries are by amateur photographers! Check out the dynamic duo behind this event if you haven't already done so!

Pani Puri/Gol Guppa Shots Recipe
Ingredients:

1. 1 pack store bought pani puri puris. There are some folks who make the puris at home which I think would be healthier..but wait who said these were meant to be healthy ;). You can see find home made puri recipes here and here
For the Pani/Tangy Spicy Water
1. 3 tbsp Tamarind Pulp (you can make this by soaking tamarind in warm water for 1-2 hours or even overnight)
2. 4 cups cold water (add more of needed)
3. 1 cup mint (pudina) leaves
4. 3-4 green chilies (adjust to taste)
5. 3 tbsp lemon juice
6. 1 tsp salt (adjust to taste)
7. 1 tbsp Jeera (roasted cumin) powder
8. 1 tbsp jaggery (adjust to taste)
9. 1/2 tsp black pepper
10. 1 packet salted boondi
11. Vodka, tequila and gin (you can also do JUST vodka..i kind of like the variety with the shots)

Method
1. Blend everything except the water together to make a fine paste. While blending, add water as needed
2. Strain the paste by adding some water if needed
3. Mix the paste with remaining water
4. Add more lemon juice, chili, jaggery or salt as needed. For example I like my water very spicy, but my husband likes his very very sweet...so we make 2 batches of it based on our tastes :)
5. Just half an hour before eating, add the salted boondi to the water
6. Fill 3/4th of the shot glasses with the spicy water. Top it off with the alcohol of your choice namely vodka, tequila, gin. If you like yours stronger, by all means feel free to add more alcohol!

Enjoy..hic hic

I will post the Mango Chocolate Recipe soon..I promise :). For now am off to Vegas for a conference..aah more chocolate and food indulgence!!

Monday, March 09, 2009

Caribbean Spice Stuffed Chicken

Caribbean Spice Stuffed Chicken


When Meeta called for a Caribbean dish for her Monthly Mingle, I had to participate, moreso as it gave me an opportunity to try out a dish from the land of one of my favorite bloggers, Cynthia of Tastes Like Home!!

I have always been fascinated by the whole/rotisserie chicken on display in restaurants, streets of China town, and now in countless stores like Whole Foods, Safeway, Costco and the like. It seemed daunting to be able cook an entire chicken in your own kitchen! And what does one do with so much chicken I wondered. Oh well, try one must, so I decided to take the plunge, and am thrilled I did. So what if it took 2 days and a whole lot of friends to help finish the chicken...all seems justified in the world of culinary pursuits :D

Actually now that I think of it, making whole chicken and then using it in a sandwich, biryani, taco or pasta is a GREAT money and time saving tip! And in these crazy economic times, this is a fantastic way of pushing the $$s further!

The chicken came out perfect....moist yet crispy, and oh so tasty! I followed this recipe pretty closely, with the exception that I stuffed the chicken with wild rice and potatoes to make it a more wholesome meal.

Ingredients
1. 1 (3 pound) whole chicken
2. 1 tbsp olive oil
3. 1/2 tsp ground ginger
4. 1 tbsp brown sugar
5. 1/4 tsp cayenne pepper
6. 1/4 tsp ground clove
7. 1/2 tsp ground cinnamon
8 tsp black pepper
9. 1/2 tsp salt
10. 1/2 tsp dried thyme leaves or 2 sprigs of fresh thyme
11. 1 1/2 tbsp fresh lime juice
12. 2 ounces rum
13. 2 cups pre-cooked wild rice (optional). I get my wild rice from Trader Joe's
14. 1 cup potatoes (optional), diced and pre-cooked
15. 6 lemon slices for the garnish (optional)
16. 7-8 grapes for the garnish (optional)

Method
1. Preheat oven to 325 degrees F

2. In a small bowl, combine the lime juice, rum, and brown sugar; set aside. Mix together the cayenne pepper, clove, cinnamon, ginger, pepper, salt, and thyme leaves.

3. Remove and discard giblets and neck from the chicken and trim excess fat. Starting at neck cavity, loosen the skin from breasts and drumsticks by inserting fingers, gently pushing between skin and meat.

4. Rub the Caribbean spice mix under the loosened skin and over breasts and drumsticks. Stuff the rice and potato mixture in chicken cavity. Tie the ends of the legs together with twine. Lift the wing tips up and over back and tuck them under chicken. Place chicken, breast side up, on a roasting pan coated with cooking spray

5. Place the pan in the oven for about 90 minutes, until the juices run clear or until a meat thermometer inserted in center of the thigh reaches 180 degrees F. Allow chicken to rest for 10 minutes before carving.

6. Garnish with fresh thyme, grapes and lemon slices

Tip: Baste the chicken with the sauce every 20 minutes while it's cooking

Enjoy :)

Thursday, March 05, 2009

Seafood Paella

Seafood Paella


Paella almost ready


Going, going gone!


I have taken the longest blogging break it feels like. As mentioned in my last post, I barely cooked much last year owing to my pregnancy. But now that I am back, seems like am on a wild cooking spree!

I recently met a friend for some tasty dimsum. And post dimsum what do I see next door...a Ranch 99! Being right there, I had to go in and get me some clams n shrimp without a real plan for the clams (isn't that always the case!).

Last week I decided to put those clams to good use with some seafood Paella. Paella is a great dish to make for a number of reasons. Firstly how can you go wrong with shrimp, clams, sausage, chicken and wine :D Moreover, its a complete 1 pan dish, which makes cleanup a snap! I used Tyler Florence's Ultimate Paella Recipe, but modified it based on my friend M's super useful tips n tricks and used ingredients that are easier to find :).

Seafood Paella Recipe
Ingredients
1. 3-pound chicken breast, cut into pieces
2. Smoked Andouille sausages, sliced thick. The original recipe calls for Chorizo sausages sliced thin. I did not find chorizo sausages at Trader Joe's, so picked up the andouille sausage instead and it tasted great! Also, I like my sausage pieces to be chunky vs thinly sliced.
3. 1 dozen littleneck clams, cleaned
4. 1 pound jumbo shrimp, peeled and de-veined
5. 1 cup red and green bell pepper, diced
6. 1 onion, diced
7. 4 garlic cloves, crushed
8. Bunch flat-leaf parsley leaves, chopped, reserve some for garnish
9. 1 (15-ounce) can whole tomatoes, drained and hand-crushed. You could also just boil 5-6 tomatoes, peel and dice them finely.
10. 4 cups short grain Spanish rice. I got mine from Whole Foods in the specialty foods aisle.
11. 1/4 cup extra-virgin olive oil
12. Salt and freshly ground pepper
13. 6 cups chicken stock. You could also just use warm water instead
14. 2 tsp oregano
15. 1 cup white wine (optional)
16. Generous pinch saffron threads
17. 2 tsp red pepper flakes (optional)
18. Lemon wedges, for serving

Special equipment:
1. Large paella pan or wide shallow skillet. I got mine from Bed Bath and Beyond for $19.99 and it worked perfectly. Will surely be using it for a long time to come!

Method
1. Rub smoked paprika, salt, pepper, oregano and oil mix all over the chicken and marinate chicken for 1 hour in the refrigerator.

2. Do the same thing (Rub smoked paprika, oregano, salt, pepper and oil mix) all over the shrimp and marinate for an hour in the refrigerator.

3. Heat oil in a paella pan over medium-high heat. Saute the sausage until browned, remove and keep aside. Add chicken, and brown on all sides. Remove from pan and keep aside. Add the shrimp, and remove when it changes color to a pinkish shade or even slightly browned. Remove from pan. Lastly sautee the bell pepper for 2 minutes and remove.

4. In the same pan, make a sofrito by sauteing the onions, garlic, and parsley. Cook for 2 or 3 minutes on a medium heat. Then, add tomatoes and cook until the mixture caramelizes a bit and the flavors meld.

5. Fold in the rice and stir-fry to coat the grains. Pour in chicken stock and simmer for 10 minutes, gently moving the pan around so the rice cooks evenly and absorbs the liquid.

6. Add chicken, chorizo, and saffron. Add the clams and shrimp, tucking them into the rice. The shrimp will take about 8 minutes to cook.

7. Add some white wine (optional) for flavor

8. Give the paella a good shake and let it simmer, without stirring, until the rice is al dente, for about 15 minutes.

9. During the last 5 minutes of cooking, when the rice is filling the pan, add the red pepper flakes and saffron strands. I add the pepper flakes to add some zing to my paella.
When the paella is cooked and the rice looks fluffy and moist, turn the heat up for 40 seconds until you can smell the rice toast at the bottom, then it's perfect.

Tyler's note: The ideal paella has a toasted rice bottom called socarrat.

Remove from heat and rest for 5 minutes. Garnish with parsley and lemon wedges.

And really that's it! Enjoy :)

Monday, February 16, 2009

Pregnant Pause

Back After a Pregnant Pause


Thanks to all the folks who left comments, sent emails asking where I was, and why the blog was dormant for a while. The reason was I got pregnant, and had the worst case of morning sickness which sadly lasted all day long to the next morning ;).

Even though I wasn't cooking a whole lot, I did enjoy my mom/sister/friends' fantastic cooking for the last few months :P

Now its time to get back in the kitchen post babies, so look forward to posting some g8, healthy, easy to cook recipes!!

Tuesday, November 06, 2007

Marathi Series: Kanda Pohe & Mixed Bhaji Platter

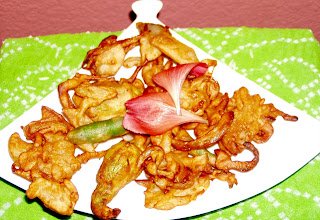
Marathi Series: Kanda Pohe & Mixed Bhaji (Vegetable Fritters)


This is the 2nd post in the Marathi food series. You can see the reason for the Marathi series and the 1st post here.

Bhaji Platter or Fritters
Can you guess all the different vegetables in there? Answer is in the next 2 paras !


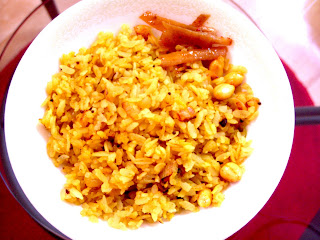
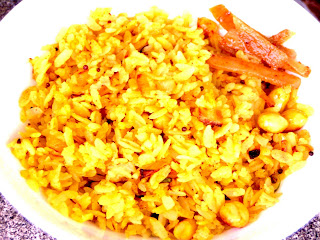
Quintessential Comfort Food: Kanda Pohe or Spicy Beaten Rice


Every time I call India these days, everyone is busy gearing up for Diwali...making sweet & savory snacks also known as Pharaal in Marathi, buying new clothes and fireworks, and sprucing up their homes among other things! My grandparents are visiting their sons and daughters in my home town of Pune, and just speaking to them over the phone makes me miss them even more :(

What I needed was down right comfort food to make up for me not celebrating Diwali with them (hopefully next yr tho...)! So off I went and cooked up some Pohe and a bhaji (also known as pakoras in Hindi) platter with onion bhaji, potato bhaji, mirchi bhaji, sweet potato bhaji and squash flower bhaji..yummmm! Now this surely was not a bad way to comfort yourself ;).

I won't post the recipe for the pohe, as there are innumerable recipes for that on the blogosphere. You can see some great versions ranging from the traditional version here to an experimental version here.

Bhaji Platter/Vegetable Fritters
Ingredients
1. 1/2 cup onions thinly sliced
2. 1/2 cup potatoes thinly sliced
3. 1/2 cup sweet potatoes thinly sliced
4. 4-5 green chillies or jalapenos slit open partly. Make sure to keep the ends intact
5. 1/2 cup squash flower
(You can add other vegetables like thinly sliced eggplant if you like)
6. 21/2 cups chickpea flour/besan
7. 3/4 cup water
8. 11/2 tsp corriander/dhania powder
9. 1 tsp cumin/jeera powder
10. 1 tsp red chili powder
11. 1 tsp carom seeds/ajwain (optional)
12. Salt to taste
13. 3 cups oil for frying. I use olive oil
Method
1. Add some salt to the sliced onions and keep aside for 5-10 minutes
2. To this add all the other vegetables and the dry ingredients (minus the oil and water). Mix well and let rest for another 2-3 minutes
3. Heat oil in a deep frying pan/kadhai
4. Take a tsp of the heated oil and add it to the dry mix. Miss well. This step makes the bhajis nice and crispy!
5. Add water as needed to the mix to make a smooth yet slightly thick batter
6. Batch by batch, drop & fry to a golden brown the onions then potatoes, then sweet potatoes, then squash flowers and then the chilies covered in batter.
The chilies should be added in the end, as they tend to pop up sometimes with the seeds spreading into the oil.

Serve with mint chutney or ketchup.
Enjoy :)

Sunday, November 04, 2007

They are here!!!

They are Here & Fresh Pesto Pasta!!!

The 2 books that Kalyn sent me are finally here and they are absolutely FANTASTIC!!! I 1st received the Vegetables Everyday and though that was great. But then few days later, received the Herbs & Spices: the Cook's Reference book and was in food heaven ;) Its a great book detailing spices from across the world, ranging from African to Indian to Italian to Moroccan and how you can cook with them!

I can't wait to start cooking from both these books. Kalyn, thanks a ton again for these wonderful gems!

Aren't they Beautiful?

Petso Pasta made with Fresh Basil


Inspired by the Vegetables Everyday book, cooked up some Pesto Pasta with fresh basil I have been successfully growing (quite rare for me :() for a while now. The simplicity of the pesto went so well with the multi-flavored shell pasta I picked up on my last trip to Paris. Yes, R & I are pasta snobs where we are not too fond of the wheaty, pasty pasta you get in most stores here. Though I must admit TJs and Whole Foods are quickly making that a thing of the past! w00t!


Since this was one of my few successful attempts to grow my own food, I am sending this pasta to Andrea's Grow Your Own event!
Fresh Pesto Pasta
Ingredients
1. 1 pound pasta of your choice. I used shell pasta
2. 3 cups fresh basil
3. 2 tablespoons pine nuts, untoasted
4. 1-2 cloves of garlic
5. 1-2 jalapeno (optional)
6. 1/2 cup extra-virgin olive oil
7. 1/2 cup Parmigiano-Reggiano cheese, grated
8. Salt and freshly ground black pepper to taste
9. 1 cup dill (optional)
Method
1. Bring a large pot of salted water to a boil for the pasta
2. In a blender, combine the basil, pine nuts, garlic, jalapeno and olive oil. Blend till its pureed
3. Add the cheese, salt and pepper, and blend again
4. Cook the pasta for about 3 minutes in the boiling water until al dente (should be firm to the touch)
5.Drain and transfer the pasta to a large bowl. Do not rinse the pasta as that will cause all the great nutrients in the pasta to get washed away!
6. Add the pesto and dill to the pasta and toss. Add a drizzle of oil and top with cheese, if you like.
Enjoy :)

Tuesday, October 30, 2007

Scary Fingers..Getting Ready for Halloween!

Scary Fingers..Getting Ready for Halloween!

I recently found these batty err nuts at Berkeley Bowl recently. Any ideas what they are?

Batty err Nuts!


Chicken Fingers


Who ate them all?


Given, its Halloween tomorrow, what else does one write about other than creepy, crawly, scary food!!! I was inspired by all the crawlies on Food Network which led to these awful looking, but yummy tasting chicken fingers!

Btw, Are people celebrating Halloween tomorrow? If yes, what are people planning to dress up as??? I am still unsure..have a whole bunch of costumes from the last few Halloweens ranging from a devilish angel (how original ;), to a gangster's moll to..u get the drift ;)

Scary Chicken Fingers
Ingredients
1. 1/2 pound chicken breast
2. 2 tsp Cajun Creole seasoning. You can use Paprika instead.
3. 1 tsp black pepper
4. 1-2 tomatoes for the nails
5. 1 tsp olive oil
6. Salt to taste
Method
1. Clean and thaw the chicken breasts to room temperature
2. Pre-heat oven to 350 degrees
3. Cut the chicken in thin, finger like shapes. Taper the front to be thinner than the other end
4. Season with the cajun spice (or paprika), salt and pepper
5. On a cooking sheet, drizzle some of the olive oil
6. Place the chicken fingers on the sheet. Drizzle with the remaining oil
7. Bake for 12-15 minutes at 350 degrees
8. Cut tomatoes to small nail like shapes. Using a tooth pick piece, nail (ahem!) the tomato pieces to the chicken fingers.
Enjoy :)

Sunday, October 21, 2007

Ode to Kalyn's veggies event

Ode to Kalyn's "Guess 2 popular veggies event"

Crostinis all laid out

Nothing beats fresh basil!

Take a bite!!

A few days ago, the wonderful Kalyn of Kalyn's Kitchen asked her readers to vote for the 2 most popular vegetables. I had no idea then that my simple response of Tomatoes & Basil, 2 of my all time favorite veggies would win me 2 awesome books! I just received my 1st book, Vegetables Everyday, which is filled with the most wonderfully simple vegetarian dishes. Can't wait to try them out. Thanks again Kalyn!

As a tribute to these super popular vegetables, I made my friend S's basil and tomato crostinis. Again, so simple to put together, yet packed with flavor. The combination of mozzarella with basil, tomato and some good balsamic vinegar is to die for!

Tomato Basil Crostinis
Ingredients
1. 1 packet mini toasts (I get mine from TJs) or bread (baguette/sour dough) cut into bite sized squares
2. Fresh mozzarella cheese
3. Fresh basil
4. Cherry tomatoes cut in half. You could also use regular tomatoes, but tastes better with the cherry tomatoes
5. Good quality balsamic vinegar. I recently bought the balsamic vinegar spray from TJs, and LUVD it, It is such a great idea as the quantity of vinegar is just right when sprayed and spreads evenly!
Method
1. Assemble the mini toasts/bread pieces
2. Layer the mini toast with a slice of the cheese, then topped with the cherry tomato and a leaf of basil.
3. Spray/Drizzle with balsamic vinegar
And really thats it! Enjoy :)

Monday, October 15, 2007

Non Fat Chips (really ;)

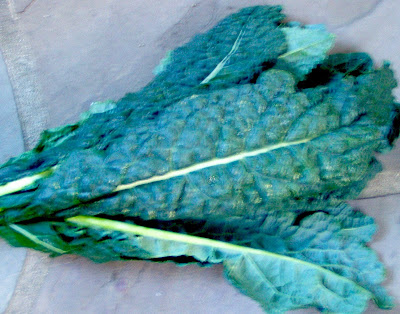
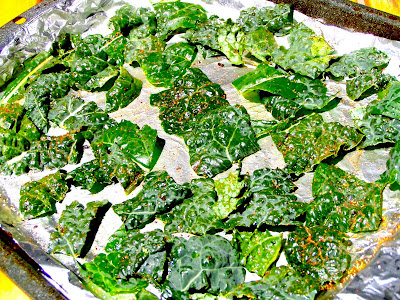
Non Fat Kale Chips..That ought to bring on a smile!


Very Green Kale


Ready to Eat!

Kale is a very healthy, and very versatile vegetable! It is rich in vitamin K, vitamin A, vitamin C and calcium. I was shocked to find that Kale was one of the most common vegetables in Europe up until the Middle Ages. Now how do I know all this? Why, thanks to Wikipedia of course !

Kale chips are extremely healthy and tasty. They have almost no fat, and in my opinion tasted better than most of those scary oily, trans fat laden chips out there! I first heard of this recipe from a nutritionist who was brought into work one day to help us all get healthy and live better (ahem!) lives. The only 2 things all of us remember from that session was this wonderful Kale chips recipe and the amazing food the nutritionist handed out at the session (tch tch..I know thats sad :()

I hope I am redeeming myself by posting this recipe, hoping someone out there will get off their potato chip addiction (I soo hope the nutritionist who tried to help us useless souls is reading this :P)!

I am sending this guilt free chip thats actually err good for you to Hima for her Whats your favorite diet food event! Check out her event if you want to purge yourself of all those tempting holiday goodies :(

Now if that doesn't make you smile, may be this will?

The Feed A Hungry Child (FAHC) campaign aims to feed every hungry children, one at a time. This was envisioned by VKN of My Dhaba. To share your smiles with children around the world, visit Vijay, Mahanadi or Jugalbandi's blog along with a few others listed on their blogs to make your contribution. As if the smile was not enough, these wonderful bloggers have thrown in some great prizes like books, spice extracts, dinners, sarees for kids n more!
Kale Chips
Ingredients
1. 3-4 leaves of fresh kale
2. 1 tsp Olive oil or Non fat olive oil spray
3. 1 tsp paprika powder (optional)
4. 1 tsp ground black pepper
5. Salt to taste. Make sure you use less salt that normal as kale absorbs salt, and your regular amount may render the chips to be salty
Method
1. Pre-heat oven to 350 degrees
2. Wash and dry the kale leaves
3. Cut/tear the kale leaves into bite sized squares. Make sure to discard the thick fleshy center
4. Lay them out on a baking sheet
5. Drizzle with olive oil
6. Top with salt, pepper and paprika (optional)
7. Bake in the oven at 350 degrees for 8-10 minutes or till they become crisp. Be careful as these chips bake really quick, so you may want to check after the 1st 5 minutes.

Enjoy :)

Sunday, October 07, 2007

Marathi Series: Sabudana Wada

Marathi series: Sabudana Wada or Sago Fritters

Sabudana/Sago being Soaked


Sabudana/Sago Wada Land Slide


I think most of you know by now that I grew up in Pune in Maharashtra. Pune is a beautiful city which seemingly has it all: an abundance of hills, rivers, greenery and moderate climate for most part of the year. While most will point out that all that is rapidly changing with dried up river beds, construction on the hillsides, I have faith in the people of Pune who are trying to reclaim Pune's beauty. There are several initiatives in Pune to curb hillside construction, create a waterfront area that people can enjoy among other community projects around organic farming and vermi-composting!

I will be posting easy to make dishes from my hometown and state off and on this month. Why you ask...may be its the nostalgia of missing home during the soon to arrive festive season of Dassera / Diwali, lots of family birthdays and just an ode to the city I love!!

The 1st in the series is the ever popular Sabudana Wada or Pearl Sago fritters which are usually eaten when one is fasting! I know, with a meal like this one, I can fast all year round ;). More fasting recipes and details can be found in an earlier post here.

Several fellow bloggers have done an amazing job with the same dish. Check out 2 of my favorite versions at Tee's and Manasi's blog.

Sabudana Wada/Sago Fritters
Ingredients
1. 2 cups sago/sabudana
2. 2 medium sized boiled potatoes,
3. 2-3 green chilies finely grated
4. 1/2 cup coriander leaves
5. 1/2 cup peanut powder
6. 1 teaspoon cumin seeds
7. 1 teaspoon lemon juice (optional)
8. 1-2 pinch sugar (optional)
9. Salt to taste,
10. 3-4 cups oil for frying
Method
1. Soak sabudana in water. Drain off all the water and keep overnight
2. Mash the boiled potatoes.
3.Combine sabudana, chili paste, mashed potatoes, coriander leaves, peanut powder, cumin seeds, sugar, lemon juice. Mix well
4. Make small balls of the mixture and flatten them slightly.
6. Heat the oil in a pan.
7. Deep fry these vadas till golden brown and crispy.
Serve with Peanut Chutney

Peanut Chutney
Ingredients
1. 2 tsp red chili powder (add more if you like more spice)
2. 2 cups plain yogurt
3. 1/2 cup coarsely ground peanut (make sure the peanuts are roasted prior to grinding them)
4. Salt to taste
Method
1. Mix together red chili powder with ground roasted peanuts and salt.
2. Add plain yogurt and mix well
Enjoy :)

Wednesday, October 03, 2007

Cookies 2 way: Saffron & Coffee, Saffron & Orange

Cookies 2 way: Saffron & Coffee, Saffron & Orange

Coffee & Orange Cookies

As promised, I am writing more on the Blogging by mail event. The contents of the package I sent consisted of my home made saffron and coffee cookies, my mom's Kolhapuri masala, organic Japanese cacao and some local fresh produce from my farmer's market. I am a huge fan of the local farmers market which has introduced me to some incredible tasting vegetables and fruits which elevate cooking and eating to a whole new level! You can read Becke's comments on the package I sent her here!!

This is what I sent for the the blogging by mail event

Beautiful honey from my local market

Indian chutneys and sauces made and packaged 10 miles away!

I have posted some of the recipes made using my mom's Kolhapuri masala which I consider worth its weight in gold ;) in some of my earlier posts that you can see here and here. Today, I wanted to share cookies I sent Becke, that use another spice worth its weight in gold, yes the beautiful saffron!

I adapted the recipe from Nupur's original holiday nankhatai recipe. I wanted to make it lower in fat, so replaced the butter with oil and sugar with honey. The end result was crunchy cookies, where the taste was elevated by the addition of saffron and coffee!

As suggested by Asha and the Happy Cook (thanks guys!), I am sending this to Sunita's Think Spice event, where this month's theme is what else, the amazing Saffron!

Saffron & Coffee Cookie (adapted from Nupur's original Nankhatai recipe)
Ingredients
1. 2 cups all-purpose flour
2. 1/4 cup honey or 3/4 cup powdered sugar
3. 1/2 cup olive oil
4. 1/4 cup ghee (clarified butter)
5. 4 tsp brewed coffee (add more if you want a stronger coffee flavor)
6. 1 tbsp cup slivered almonds, toasted
7. 1/4 tsp. nutmeg
8. 1/2 tsp. cardamom
9. 1/4 tsp saffron soaked in milk
10. Pinch of salt
For decoration:
1. Almond slices
2. Saffron strands
Method
1. Pre-heat the oven at 350 degrees
2. Mix all the ingredients into the dough. Knead very gently to form a dough, using a little water if necessary
2. Place the dough in the refrigerator for 5-10 minutes if it is too sticky. Form small balls with the dough
3. Flatten each ball to form a fat disc
4. Decorate with almonds and saffron strands
5. Place on a baking sheet and bake at 350 degrees F for about 10-15 minutes till the bottom of the cookie is just browning
6. Turn off the oven and let the cookies stay inside the warm oven till the top is slightly golden
7. Remove and let cool on a rack.

Saffron & Orange Cookie (adapted from Nupur's original Nankhatai recipe)
Ingredients
1. 2 cups all-purpose flour
2. 1/4 cup honey or 3/4 cup powdered sugar
3. 1/2 cup olive oil
4. 1/4 cup ghee (clarified butter)
5. 1 tsp good quality orange extract (add more if you want a stronger orange flavor)
6. 1 tbsp cup slivered almonds, toasted
7. 1/4 tsp. nutmeg
8. 1/2 tsp. cardamom
9. 1/4 tsp saffron soaked in milk
10. Pinch of salt
For decoration:
1. Almond slices
2. Saffron strands
Method
1. Pre-heat the oven at 350 degrees
2. Mix all the ingredients into the dough. Knead very gently to form a dough, using a little water if necessary
2. Place the dough in the refrigerator for 5-10 minutes if it is too sticky. Form small balls with the dough
3. Flatten each ball to form a fat disc
4. Decorate with almonds and saffron strands
5. Place on a baking sheet and bake at 350 degrees F for about 10-15 minutes till the bottom of the cookie is just browning
6. Turn off the oven and let the cookies stay inside the warm oven till the top is slightly golden
7. Remove and let cool on a rack.
Enjoy :)

Sunday, September 30, 2007

Banana-Papaya Bread with Dried Figs

Banana-Papaya Bread with Dried Figs


My friend S and I decided to bake up a banana bread recently. I was in charge of getting the bananas. Somewhere along the way I got real hungry and ate 1 of the 3 bananas I was supposed to get :(.

Now armed with just 2 bananas in place of the requisite 3, I sheepishly walked over to S's house only to have her promptly come up with a solution...why we can add some papaya to it instead! I had my doubts about the papaya addition, but who was I to say anything given that I had eaten part of the MAIN ingredient..doh!

The end result was that the papaya complimented the bananas just perfectly in this simple yet very tasty banana bread. We eventually got so excited that we started experimenting with chocolate chips in the 2nd loaf (bad idea so won't provide that recipe here ;).

This banana-papaya bread goes to Ahaar's JFI: Bananas event originally conceptualized by the amazing Indira!

Banana-Papaya Bread

Ingredients
1. 2 cups all-purpose flour
2. 2 cups over ripe bananas, mashed well
3. 1 cup ripe papaya, mashed (optional, you can replace this with 1/2 cup of mashed banana)
4. 1 teaspoon baking soda
5. 1/4 teaspoon salt
6. 1/2 cup butter (you can replace this with olive oil for a healthier version)
7. 3/4 cup brown sugar
8. 2 eggs, beaten (feel free to use 2 cups of ostrich egg ;))
9. 1/2 cup dried figs or any other nuts/dried fruit you have at hand

Method
1. Pre-heat the oven at 350 degrees
2. In a large bowl, combine flour, baking soda and salt. In a separate bowl, cream together butter and brown sugar
3. Stir in eggs, mashed bananas, papaya and dried fig until well blended
4. Gently stir this mixture into flour mixture where it just moistens
5. Lightly grease a 9x5 inch loaf pan. Pour batter into prepared loaf pan.
6. Bake in preheated oven for 60 to 65 minutes or until brown.Insert a toothpick into center of the loaf, where if it comes out clean, the bread is ready to eat!
7. Let bread cool in pan for 10 minutes, then remove, slice and eat
Enjoy :)

Saturday, September 29, 2007

Ostrich Egg Frittata

Ostrich Egg Frittata

We got this humongous egg home one day, half expecting a baby dinosaur to come out of it the longer we refused to crack it open. When we finally did, we were rewarded with a bounty of wonderfully tasty and healthy (lower in cholesterol) version of the regular egg!
Camera used to take the pics below: Non-SLR. Olympus Digital, C-720 Ultra Zoom.
That's what it looked like when we got it

Hammer, chisel? It actually came with instructions!!


Yes, ALL that from one ostrich egg!

This is what we did with it :)


I have been meaning to write about my Ostrich egg escapades for a while now. Just as I am about to do that, I notice that Jai and Bee's 1st photography event theme is EGGS!! Serendipity anyone?

I am sending this eggstatic post Jai & Bee's way. For those who have not tried ostrich egg before, it pretty much tastes like regular egg, only 1 Ostrich egg tastes like 21 of the regular ones ;). Yup, thats right 1 ostrich egg yields yolk and egg-white equivalent to 21 regular eggs :)

Now how did we come about an ostrich egg you may ask. Well, R and I were on a tour of the California missions starting from San Francisco and going all the way down to Santa Barbara when we spotted an ostrich farm on the way! What again? Yes, an ostrich farm where they raise ostriches and allow people to go feed them. The brave ones who decided to go feed the large birds were given a LONG list of Dos and Donts (well Donts mostly :)).

R was just fascinated by the ostrich egg shell and was about to buy just the shell, when the person raising the ostrich convinced him to buy the actual egg with its goodness all intact instead. I kept nodding very vigorously, but alas R was already like a lil kid asking her all kinds of questions as to how many eggs does an ostrich lay in a week, do they protect them like mammals do etc etc. At that time I knew this was a lost cause..oh well...next thing I knew we had this HUGE (understatement!) egg sitting in our backpack where we were instructed to err keep it warm and covered???

Now the moment I heard the words keep it warm and covered, I had scary visions of a lil ostrich staring at us from the back of our car by the time we got home!
Well all ended well with us discovering the joys of ostrich egg, and for some reason we came away wondering if everyone raised ostriches instead of chicken, would that reduce the need to buy eggs as often as we do??? Hmm....now thats a thought, silly one albeit ;)

Kanchana of Married to a Desi was nice enough to highlight eggs as this month's WBB event event originally conceptualized by our favorite neighborhood doc Nandita. This way we get to click our eggs and eat them too ;). Am sending this ostrichy frittata her way!

Ostrich Frittata
Ingredients
1. 4 cups of ostrich egg well beaten. Alternatively you can use 4 regular eggs.
2. 1 cup peeled, cleaned shrimp
3. 1 cup broccoli cut into florets
4. 1 cup mushrooms, cleaned and chopped thinly
5. 1 tsp Black pepper
6. 2 tsp cajun spice (or paprika)
7. 1 tsp olive oil
8. Salt to taste
Method
1. Pre-heat the oven at 350 degrees
2. In a deep vessel, add all the ingredients above and mix well
3. Spray a thick bottom skillet with oil
4. Add the mixture to the skillet and let cook in the oven at 375 degrees for 30 minutes of till the egg turns brown
5. Once cooked, cut into wedges and serve.
I served this with some garlic bread. Made for a very satisfying meal!
Enjoy :)

Tuesday, September 25, 2007

Modaks, modaks everywhere!

Modaks, modaks everywhere

Modaks Galore

Waiting to be Fried

Last day of the Ganesh festival

Today was the last day of the Ganesh festival. It was so great having friends hop over for the evening aartis...felt very festive and a small taste of the festival in India. I made some modaks for this occasion, and it turned out to be one sweet journey with friends bringing over yummy besan laddoos, cashew laddoos, a variety of fresh fruits and chocolates!! Boy do I love festivals :)

Besan Laddoos made by my friend T

Incidentally, I was in India (Mumbai) 2 days prior to the actual festival start date, and boy was the city already geared up for the big event! Huge pandals with people working till the wee hours of the morning putting in the final touches....aah pure nostalgia :)

I have previously posted the recipe for Modaks as well as additional information on them a while back, which you can check out here :)